
Overview
If a team contacts you and asks to be registered for a tournament, you can register them directly from the Playbook backend.
There are two primary ways to do this:
- Register through the Accounts section
- Create a registration through Event Registrations
Both methods ultimately create an invoice, which the customer can then log in and pay.
Method 1: Register a Team Through Accounts
This method is commonly used when you already know the customer's account.
Step 1: Locate the Account
- Go to Accounts.
- Search for the customer account.
If the account does not exist, create one.
Step 2: Create a New Account (if needed)
- Click the Blue + button.
-
Fill in the required information:
-
First Name
- Last Name
- Mobile Number
- Role / Customer Type
Next, click the Address tab and complete:
- Address
- City
- State
- Postal Code
Note: The address does not need to be exact. The customer can update it later.
Step 3: Create Login Credentials
Enter:
- Email address (this becomes the login)
- Password
Provide this information to the customer so they can log in and view their invoices.
Step 4: Enable Email Notifications
Select the recommended email subscriptions:
- Newsletter
- Roster Instructions
- Roster Parent Not Registered
These notifications help teams manage their roster before the event.
Step 5: Create the Event Invoice
Once the account exists:
- Locate the account.
- Click the three dots (⋯) on the right side.
- Select Create Team Invoice.
Step 6: Complete the Invoice
A new invoice form will open.
Fill out the following:
Event
- Begin typing the event name.
- After four letters, a dropdown will appear.
- Select the correct event.
Division
- Choose the correct division.
Subdivision
- Select the appropriate subdivision.
Team
- Choose an existing team
OR - Create a new team if necessary.
Step 7: Confirm Registration Status
Set the status for the registration.
Common statuses include:
- Confirmed
- Pending
- Waitlist
- Cancel
- Move
- Acceptance Pending
Once completed, click Add Event.
The team is now registered for the tournament.
Method 2: Register a Team Through Event Registrations
You can also create registrations directly from the Event Registrations page.
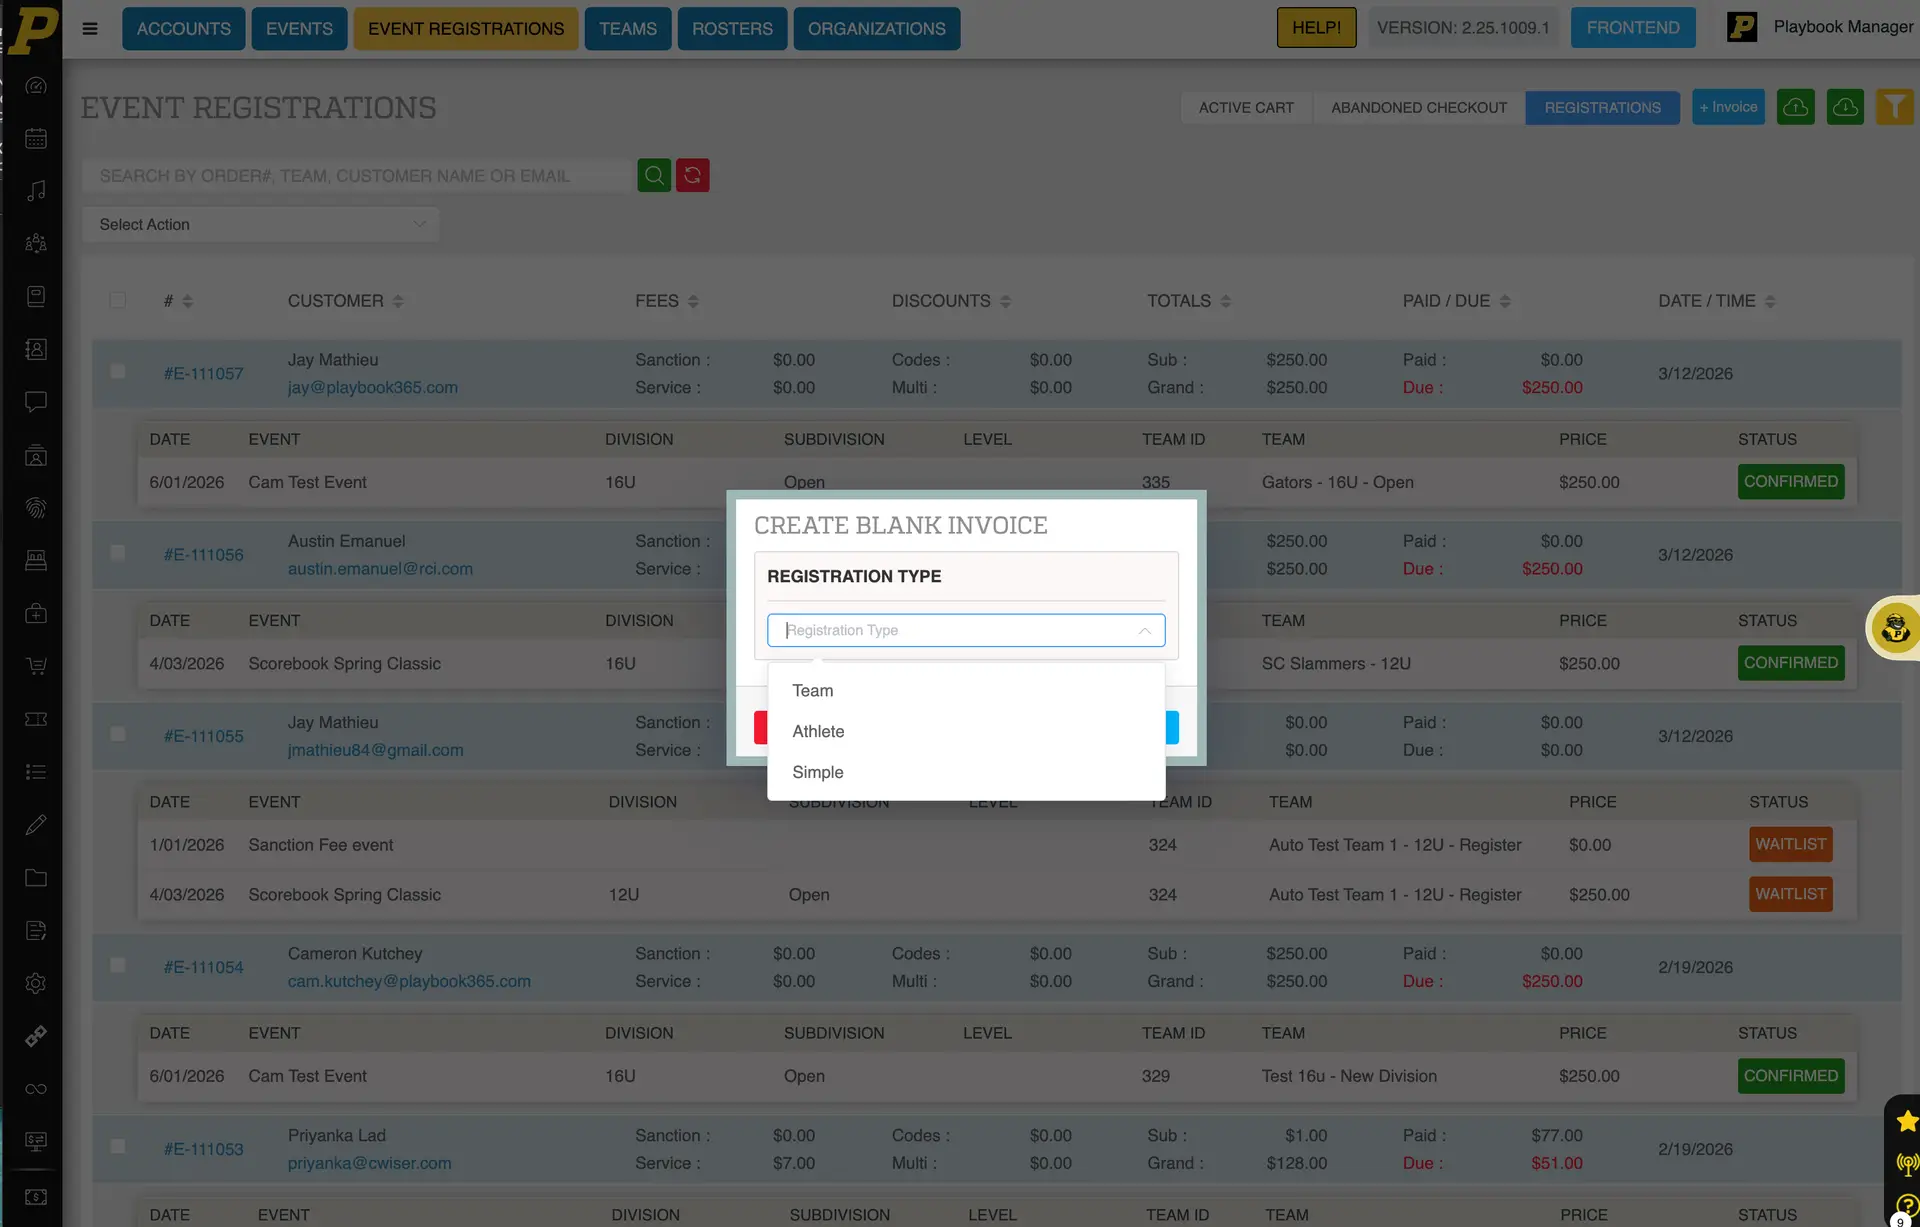
Step 1: Create a Blank Invoice
- Navigate to Event Registrations.
- Click the Blue + Invoice button.
- Select Create Blank Invoice.
Step 2: Choose Registration Type
You will be prompted to select a registration type:
- Team – For team tournaments
- Athlete – For individual player events
- Simple – For basic registrations like camps or conferences
Select the appropriate type and click Save.
Step 3: Select or Create a Customer
You can now:
- Search for an existing customer, or
- Create a new customer
To create a new customer:
- Click Create New Customer
- Enter account details
- Save the customer
Once created, the customer will appear on the invoice.
Step 4: Add the Event
Follow the same steps used in Method 1:
- Type the event name
- Select the division
- Choose the subdivision
- Select the team
You may also adjust:
- Price
- Registration status
Click Add Event to finalize the registration.
Sending the Invoice to the Customer
After the registration is created:
- The invoice can be emailed directly to the customer
- The customer can log in to their account and pay online
You can also email the invoice to yourself or an admin for reference.
Important Notes
- Teams must be attached to a customer account.
- You must type at least four letters of the event name before it appears in the dropdown.
- Customers can log in to view invoices, pay balances, and manage their registration.