
Playbook allows administrators to control how customers pay for event registrations. You can disable certain payment methods or the Pay Later option either globally across your entire site or for a specific event.
This flexibility allows organizers to enforce payment requirements, limit payment methods, or waive processing fees when necessary.
Disabling Payment Methods Globally
To disable payment methods across your entire Playbook site:
- Open the left toolbar.
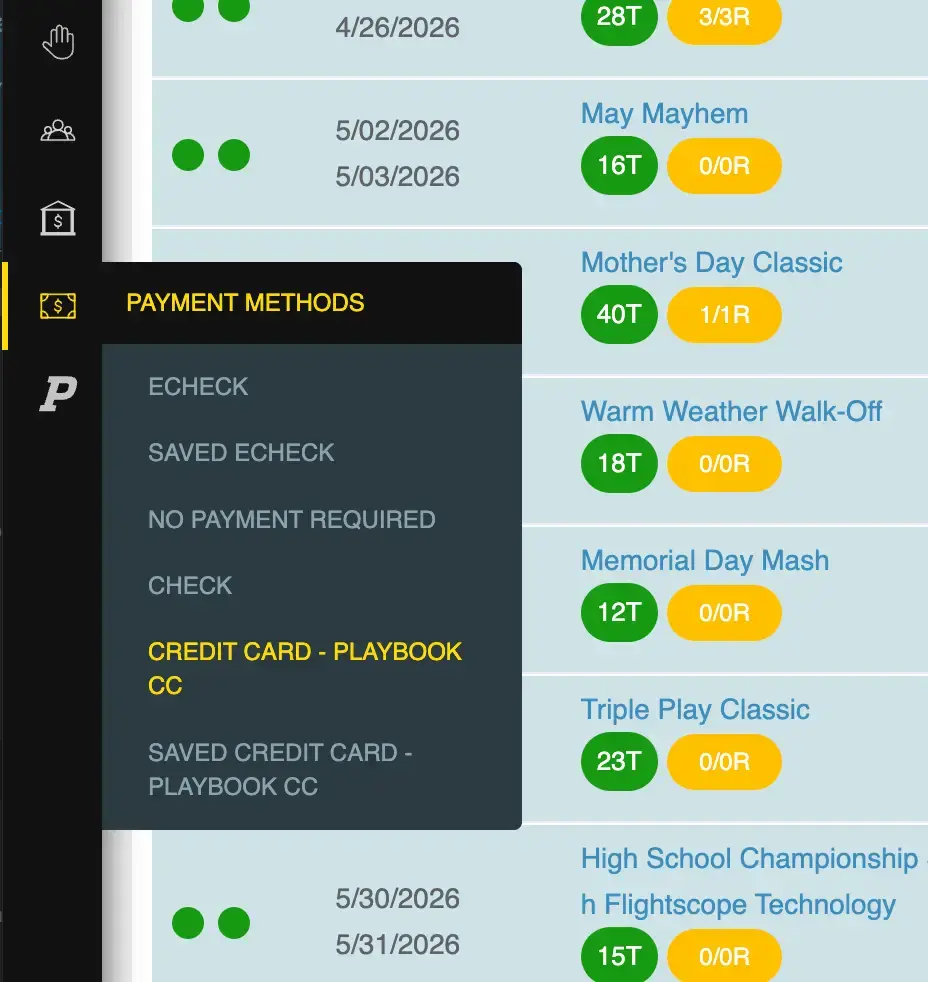
- Click Payment Methods (the dollar sign icon).
- Select the payment method you want to modify.
- Locate the Enabled setting.
- Change the value to No.
- Click Save.
This will disable that payment option for all events on your site.
Available Payment Methods
The Payment Methods page typically includes several options.
E-Check
Allows customers to pay using an electronic bank transfer.
If disabled, customers will no longer see the e-check payment option during checkout.
Save E-Check
Allows customers to store their bank account information for future transactions.
This can also be disabled if you do not want customers saving bank details.
No Payment Required
This option should always remain enabled.
It allows customers to complete registration when a coupon or discount reduces the balance to $0.
Check (Pay Later Option)
This setting controls whether customers can register without paying at the time of checkout.
- Enabled (Yes) – Customers are allowed to register and pay later.
- Enabled (No) – Customers must pay at checkout.
If you want to require payment at checkout for all events, leave this set to Yes.
Credit Card
Allows customers to pay using a credit card.
If disabled, customers will not see credit card as a checkout option.
Controlling Payment Options for a Specific Event
Payment options can also be configured for individual events.
To adjust payment settings for a specific event:
- Navigate to your Event Listing page.
- Select the event you want to edit.
- Open the Event Edit Form.
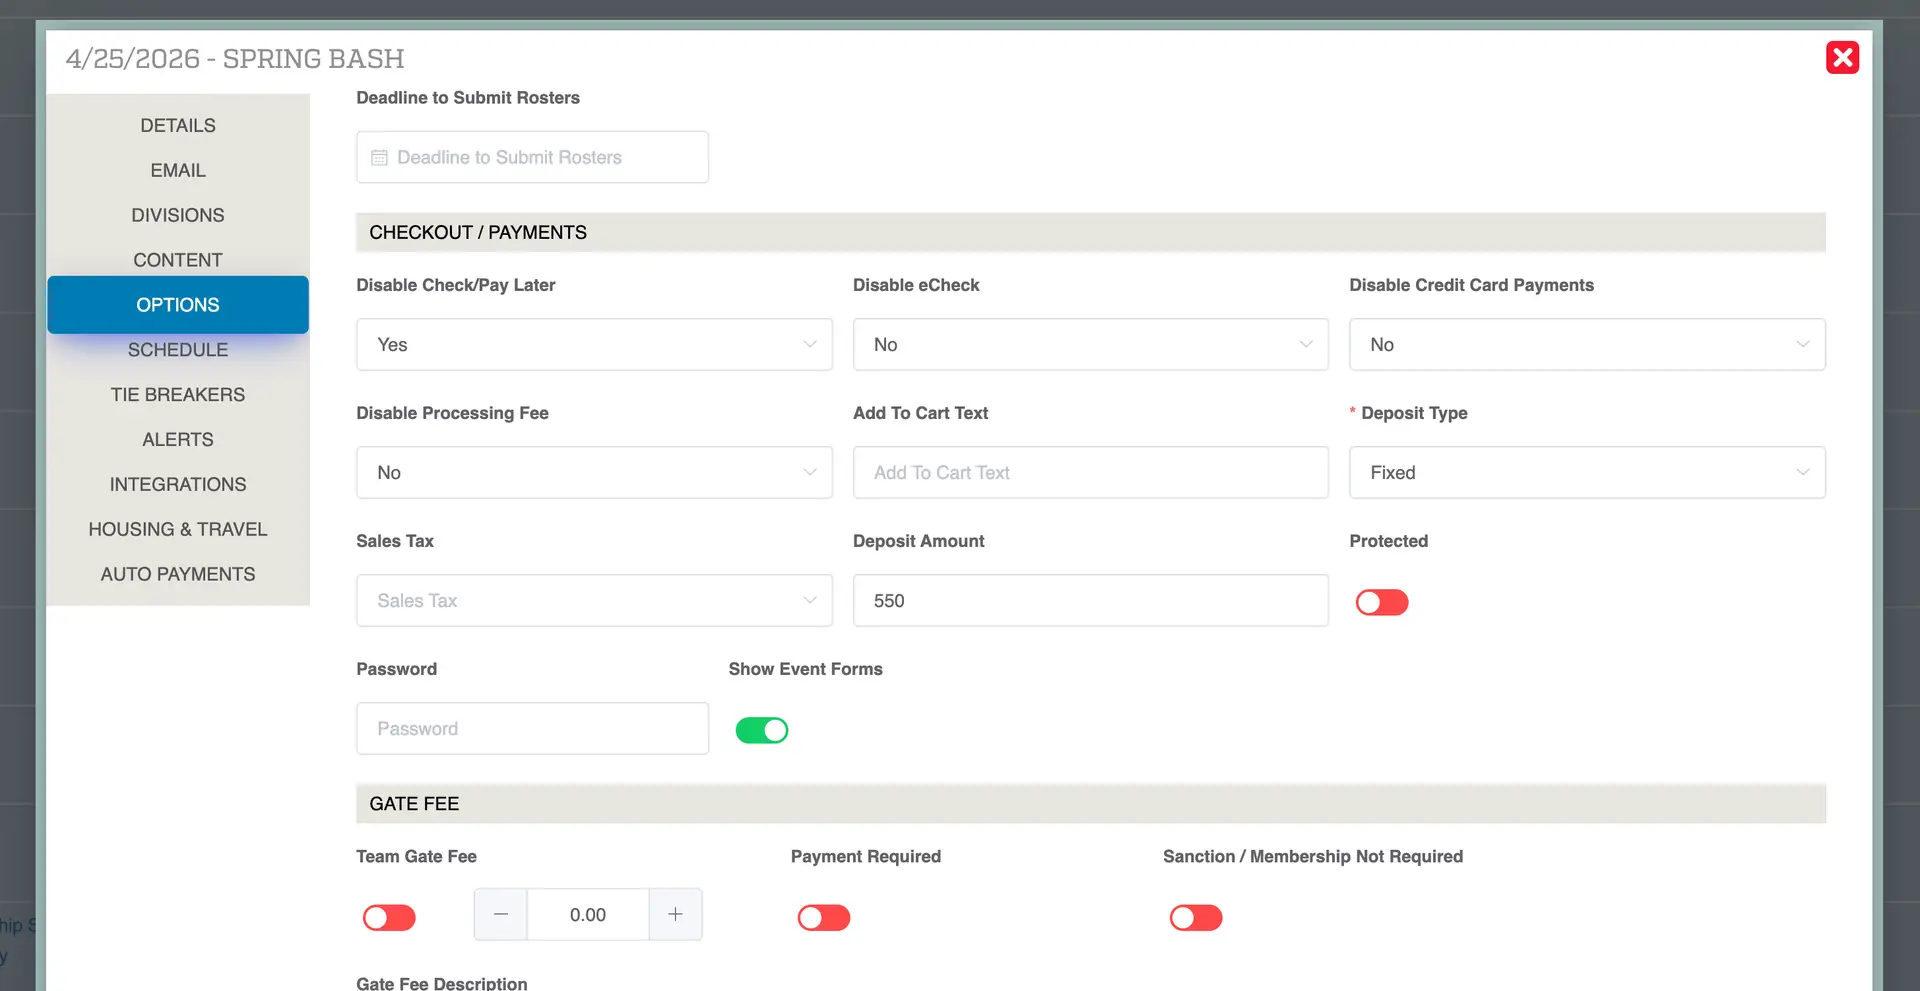
- Go to the Options section.
- Scroll to Checkout and Payments.
From here, you can override some payment settings specifically for that event.
Disabling Pay Later for a Single Event
If your global settings allow Pay Later, but you want to require payment for a specific event:
- Locate the Disable Checkout Pay Later setting.
- Set the option to Yes.
This will require teams to pay during checkout for that event.
Limiting Payment Methods by Event
Within the Checkout and Payments section, you can also limit which payment methods are accepted.
For example:
- Require credit card only
- Allow e-check only
- Allow registration without immediate payment
These settings override global payment settings for that specific event.
Disabling Processing Fees for an Event
Playbook allows administrators to disable processing fees for specific events.
This is commonly used for:
- Charity events
- Fundraisers
- Special promotions
To disable processing fees:
- Locate the Disable Processing Fees option.
- Set the value to Yes.
When this setting is enabled, customers will not be charged payment processing fees, and the organizer will absorb those costs.
Tips for Managing Payment Settings
✔ Use global settings when the same payment rules apply to all events
✔ Use event-specific settings when one event requires different payment rules
✔ Disable Pay Later when you want to ensure payment at registration
✔ Consider disabling processing fees for charity or promotional events